Using AWS Systems Manager : SSH-free access to EC2 Instances

It’s a new year and its time to up my blogging game in 2019! So let’s kick off this year with AWS Systems Manager. This has been around for some time now, but personally, I’ve never thought of using AWS Systems Manager. It was one of those things that I didn’t consider using till a customer of mine asked — “so how many of your customers using AWS Systems Manager?” . It got me thinking and with some time over the holiday break, I decided to jump back in and see what has changed over the years.
So what is AWS Systems Manager? It is an agent-based service that allows you to manage VM’s, EC2 Instances across AWS, on-premises. There are few features that I personally think are very useful to manage your AWS Infrastructure at scale.
The first one is the EC2 RunCommand. This was introduced back in 2015 and over time the folks at AWS have added some nice features. It essentially allows you to implement configuration changes across specified instances in a consistent manner. For e.g: in the example, I will show you below, I will show how to install the Telegraf agent to be used by Wavefront. Using the IAM policies, we can also ensure who has control to make these changes and also provide a clear audit path. The goal ultimately is to completely do away with the jump host/bastion host concept and simplify it as much as possible.
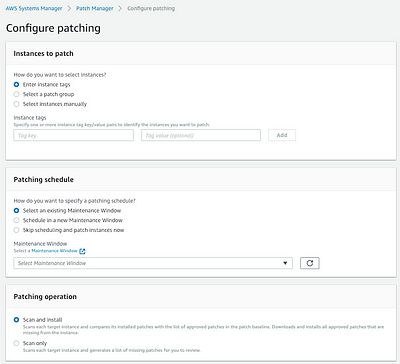
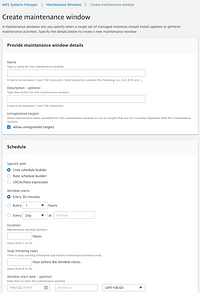
The next two features that are worth mentioning are Inventory and Patch Manager services. These allow gathering inventory as the name suggests of which software and services are running on the instances and Patch Manager allows us to create baselines and apply them to managed instances. These updates can be applied to the instances using Maintenance Windows. Another feature worth mentioning is *Compliance. *This is reporting mechanism of AWS SSM that helps to ensure that the instances are compliant with the patch baselines. If we do find issues, using the EC2 RunCommand, we have the ability to automate large scale changes.
We ran through the features fairly quickly because the feature names themselves are pretty self-explanatory and you likely came to the entry to find technical details of how this works. Let’s get started.
There are three main steps in order to get going. First, is configuring the appropriate IAM role, second is to install the SSM agent if required and lastly AWS SSM setup. Let’s go through them below.
Installation and Configuration
Step 1: Configure an IAM role that will be attached to the EC2 instances. We leverage the policy AmazonSSMServicePolicy that allows SSM service access to the instances. Once this IAM role is available, we will leverage this once with spin up EC2 instances. Note: You do have the option to pick from a variety of built-in policies that are specific to EC2 instances, Full Access, Read-Only and policies that are specific to Automation or Maintenance Windows. If you’re looking to grab audit trails, using an action specific policy is probably best. Below you’ll see the difference between all of them
All IAM Roles created for SSM
IAM role that allows full SSM access
IAM role allows EC2 access only
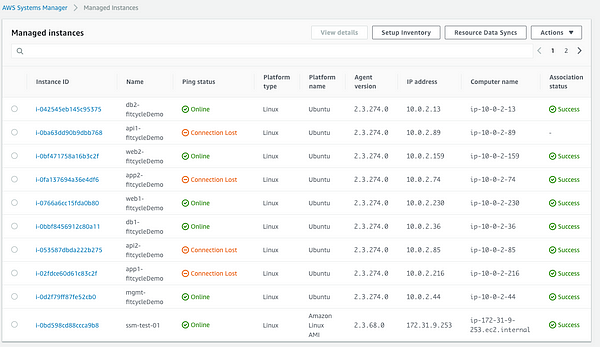
**Step 2: **Attach the IAM role we created above to the running EC2 instances or create EC2 instances of your preference and attach the IAM role. In my case, the application I deployed is based off a Terraform template. I also have two EC2 instances that I deployed to show newly deployed EC2 instances. We will leverage both IAM policies created above and attach to the instances.
EC2 SSM Role
SSM Full Access
**Step 3: *You may need to install the AWS SSM agents. Check the documentation on Installing SSM agents *to ensure if the EC2 instances you launched in Step 2 already have the SSM agents available. In the example above, the EC2 instances launched using the Terraform template are using Ubuntu 18.04 AMI’s that do not have the SSM agents built-in. I used the steps that are outlined in the section for the Ubuntu server using the snap package. Once I have the agents installed, I can convert it into an AMI and use that as part of my Terraform template going forward. Post-installation ensure that the SSM service is up and ready. The other two EC2 instances are based on Amazon Linux, where the SSM agent is available by default. The AWS SSM agent is available by default on the following EC2 AMI’s :
- Windows Server (all SKUs)
- Amazon Linux
- Amazon Linux 2
- Ubuntu Server 16.04
- Ubuntu Server 18.04
Ubuntu AMI on left and Amazon Linux2 AMI on right
AWS Systems Manager Console
The landing page of the AWS Systems Manager Console walks you through some initial steps of how to use each of the components. First up, let’s explore the Find Resources and Resource Groups options.
I already have tags set up as part of the Terraform template and one of the tags is* “Environment:winterfell”. *This tag helps me identify different versions of the application and yes I use GoT references :)
In the grouping criteria, I would like to identify all the resources that are attached to this version of the application. I specify the tag value and look up the query results.
The query results helps identify all the resources that were deployed — EC2 instances, VPC, Subnet, IGW. The resource group is created here can be used along with several of the other functions such as Insights, Compliance tabs. I’ll look to cover those in subsequent blogs in much more detail, but as you can see the grouping is a pretty basic function that is required by all these other features.
As I mentioned at the beginning, one of the key drivers is to provide an easy way to access the EC2 instance without requiring an SSH key or bastion/jump host. This is done by using the AWS Session Manager with a few simple steps.
Click on Session Manager, select a target instance and click on Start Session and that’s it! The OS console window opens and you can execute any commands on the instance. For e.g. let’s consider the example of installing the Telegraf agent that is leveraged by Wavefront.
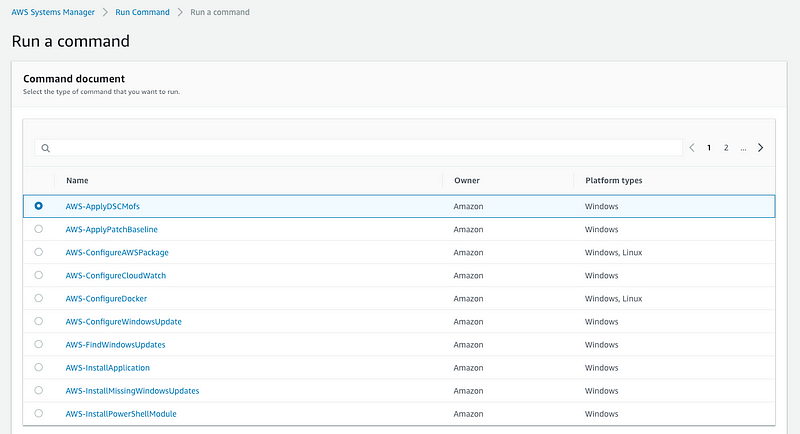
Another option is to leverage the Run Command feature.Click on the Run Command tab on the left and select AWS-RunShellScript
In the command parameters, I specify the shell script, I’m looking to execute
Next, you have the ability to select either individual instances or specify tags. For simplicity sake, I’m showing the same AWS Linux AMI that I used above.
You can specify some parameters such as rate-control to specify the number of targets you want to execute the command on and also timeout values. You can also write the command out to an S3 bucket for logging purposes or leverage SNS notifications for when the tasks are completed.
Once you kick of the RunCommand, you can follow the progress and look through the task execution history by browsing under the *Command History *tab. You’ll find details on the commands and details on the execution in there.
Conclusion
So there you have it, that’s a brief rundown of AWS Systems Manager. It allows you to automate tasks like agent-installation as I described above in a simple and easy manner without the need for a bastion host or SSH key. Do you use it — love it/hate it? Keep the feedback coming! Till next time …