Triggering a Jenkins Pipeline on ‘git push’


The previous articles in this series have described a method for creating a Kubernetes cluster, installing Jenkins within that cluster, and building a Jenkins pipeline on those components. In this entry, the series will conclude by describing the process to trigger such a pipeline with a ‘git push’ operation to a specified repository.
To add this webhook configuration as a continuation of the previous articles in
this series, please log into the CloudBees Jenkins Operations Center (CJOC)
instance. IPlease access the operations center UI on the following URL,
http://<lb-ingress-hostname>/cjoc. To retrieve the ‘lb-ingress-hostname’
value, use the command: kubectl describe service nginx-ingress-controller -n ingress-nginx. The ‘Loadbalancer Ingress:’ field holds value in question. If
you need to recover the admin password for operations center, use this command:
kubectl exec cjoc-0 cat /var/jenkins_home/secrets/initialAdminPassword — namespace cloudbees.
To begin the configuration, navigate to the ‘Manage Jenkins’ menu from the operations center landing page. This item can be found in the vertical navigation bar on the left edge of the screen as seen in Figure 1.
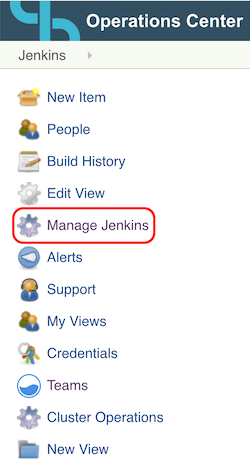 Figure 1. Locating the ‘Manage Jenkins’ menu
Clicking on ‘Manage Jenkins’ will take you to a page listing several sub-menus. The item to click on here will be the ‘Configure System’ icon. This should be the top icon in the list. The resulting configuration menu will feature many options. To enable the webhook, please scroll down to the GitHub section of the menu. If a GitHub section is not present, ensure that the GitHub plugin is installed as directed in the previous article in this series. This plugin can be installed at any time from the ‘Manage Plugins’ menu under the ‘Manage Jenkins’ item.
Once the GitHub section of the configuration has been located, note the available options. Before doing any GitHub server configuration, we will need to use our credentials to obtain a token. To do this, find the button in the bottom right hand corner of the GitHub section as seen in Figure 2 and click on it. The button will be labeled ‘Advanced’ and will not be the only button in the GitHub section to carry this label.
Figure 2. The button to enable credential conversion to a token
After locating and clicking this button, some new options will appear at the bottom of the GitHub configuration section. From these options, click the button labeled ‘Manage additional GitHub actions’ as shown in Figure 3. From the resulting dropdown, select the ‘Convert login and password to token’ option.
Figure 3. Initiating the credential to token conversion process for the GitHub webhook
The actions above will spawn yet another subsection of options. In the text fields that appear, ensure that the value in the ‘GitHub API URL’ field is https://api.github.com. Select the radio button next to ‘From login and password’ and provide the username and password to the GitHub account where you have cloned the repository specified in the previous articles in this series (https://github.com/dillson/jw-workshop). Then click on the ‘Create token credentials’ button below the text fields as seen in Figure 4.
Figure 4. Creating the GitHub token credentials
After the credentials are created, find and press the ‘Apply’ button at the very bottom of the screen. This will save the configuration without leaving the menu. With that section completed, please return to the top of the GitHub configuration section. In the fields at the top of the section, fill them out as follows:
- Name: Use a human readable value of your choice. I generally use ‘github’
- API URL: https://api.github.com
- Credentials: There should be an autogenerated set of credentials in the dropdown menu, as shown in Figure 5. If such a value has not yet populated, click the ‘Save’ button at the bottom of the screen and return to the ‘Configure System’ menu again.
- Ensure the box next to ‘Manage hooks’ is checked
After completing these fields, click the ‘Test connection’ button. A response similar to that in Figure 5 should appear. Once all of this configuration has been entered, click on the ‘Save’ button at the bottom of the screen.
Figure 5. GitHub Server configuration options after obtaining a token
With this configuration complete (and the ‘GitHub hook trigger for GITScm polling’ option enabled in your pipeline configuration), the configuration should now be in place to take advantage of this webhook trigger. This can be validated from the GitHub web interface, or as is occasionally the case, troubleshot. To find the correct section, point your browser to the following URL with your username substituted for the placeholder: https://github.com//jw-workshop/settings/hooks .
If the previous configuration has been properly entered, a URL should be displayed on the specified screen. Clicking the ‘Edit’ button below the URL will drill down into a more detailed menu. To troubleshoot, first make sure there are entries in the ‘Recent Deliveries’ section fronted by a green check mark. If there are no entries, or if entries are present but fronted by a red icon, additional inspection is required.
To verify that the configuration is correct, ensure the Payload URL matches the URL of your Jenkins master with ‘/github-webhook/’ appended to it. Verify these other values:
- Content Type: application/json
- The ‘Just the push event’ radio button is selected
- The box next to ‘Active’ is checked
If any of these values are not correct, modify them and then click the ‘Update webhook’ button.
With the webhook configured, the final step will be to validate the correct operation of the trigger. In the Jenkins UI, navigate to the status page of the pipeline in question. Remain here and note the current number of pipeline builds.
From your text editor of choice, edit the a file within the repository. This can
be as simple as adding a comment to the Jenkinsfile or README, or by editing the
application code itself. The simple node.js/express application in original
GitHub repository
(https://github.com/dillson/jw-workshop)
should make this fairly simple. Once the edit(s) have been made, save the
changes and run the command git add .. Follow this with a git commit -m '<message>'. The value should be descriptive as to the change, I have
used phrases such as ‘testing webhook via editing home.hbs’. The last step will
be to run a git push -u origin master. Upon running this command, return to
the status page of the pipeline you created. You should see the N+1 number build
of the pipeline appear in the UI within a few seconds. If not, refer to some of
the troubleshooting steps in the previous section of this article.
The article above describes the configuration of a pipeline trigger via a git push operation into a specified GitHub repository. By layering this work on top
of the previous two articles in this series, a completely automated CI/CD
process is described against a simple application.
CI/CD with CloudBees Core on VMware Cloud PKS Series:
- Deploying CloudBees Core on VMware Cloud PKS
- Building a CloudBees Core Pipeline which Deploys to a VMware Cloud PKS Cluster
- Triggering a Jenkins Pipeline on a ‘git push’